DIY Nixie Tube Clock Build
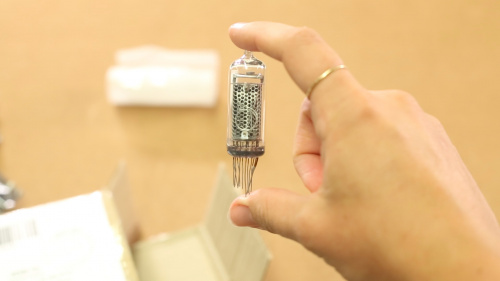
I’ve always liked the look of a Nixie Tube Clock. They are Cold War-era clocks (now seen as steampunk) with metal coils in glass casings. I decided I wanted to build one, but the pieces were harder to find than I anticipated. SparkFun doesn’t carry the boards or kits and it seems they’re only found in Eastern Europe on eBay. The glass tubes themselves are not being produced anywhere that I could find, so the only ones available were used from a seller in the Ukraine also off eBay.
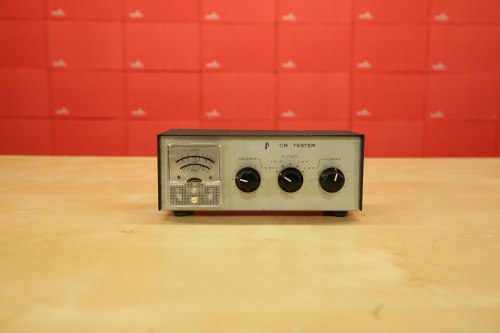
I wanted the base of my clock to be different, not a wooden or 3D-printed box, but something with gauges and knobs. I continued my eBay search and found an old CB radio tester from JCPenny for pretty cheap. I can’t find a date anywhere on this thing or on the internet, so if you happen to know, I am curious.
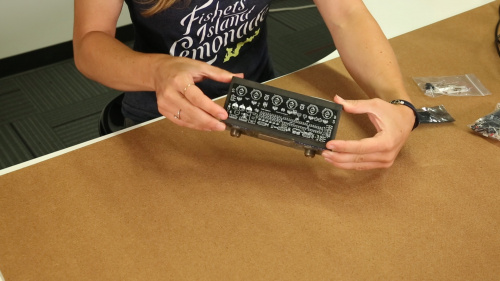
I made my eBay purchases and all the pieces made it to Colorado without any problems. The board fit quite nicely to the CB Radio Tester so we were off to a great start. I didn’t realize how many pieces really were involved, so this quick soldering job became a three-day build since I never had the time to do it all in one sitting and ran into a few problems.
In the video, you can see that I ran into more than one problem. I am SparkFun’s video producer, so I have no engineering experience and this was really the first board I had ever soldered. A lot of this project was blindly following along with the hookup guide, with poorly lit pictures, and just hoping things would work out.
Generally, they did. I put a few resistors in the wrong place, but luckily Feldi caught that before I powered it up, so I learned the excruciating process of desoldering resistors and fixed the problem.
Next was soldering the actual nixie tubes to the board. This process made me want to throw it at a wall because the wires were never long enough to comfortably attach each tube. I spent so much time meticulously placing each wire from each tube in to solder with tweezers. I am not the most patient individual, so this process was more of a learning experience for me than anything in the build. If you choose to build one, I’d recommend getting some extra hands to hold them in place to solder. Six were soldered, but one is a little crooked and it will forever annoy me.
I got some help from a few other employees to teach me how to dremel out a rectangle in the metal base of the CB Radio Tester. No surprise – I messed that up the first time and didn’t make it large enough to fit the tubes, so it was back to the machine shop for more dremeling and filing, and finally everything fit together. I literally did a backflip in celebration (check the bloopers at the end of the video).
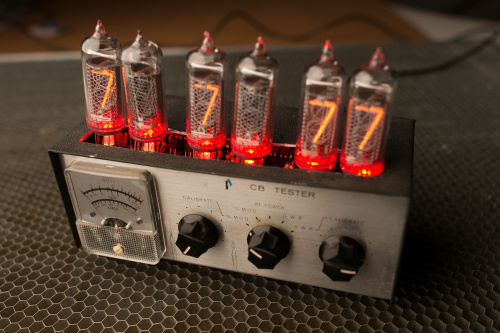
It’s not perfect, but I like to think it looks original and I am just happy I was able to build it. The hookup guide says it works on a 5V power supply, however the tubes don’t light up with their demo code unless it’s powered by a 9V. So I am constantly afraid it will explode at any moment when it is powered. To people who know how electronics work, I understand that this might be an irrational fear, but you should see my soldering job. Yeah, that thing will explode eventually.
This is where I am at in this build. Four of six tubes will cycle through the demo code; I’m unsure if that is intentional, and will find out once I upload the code to actually connect to the WiFi and work like a real clock. Four out of six is a win in my book, for someone who has never built a kit with Cold War-era parts.
Nixie Tube Clocks are known to not last very long when powered, so I might just keep it as a novelty on my desk and turn it on if someone asks about it during a tour or something. It was strange filming myself for this and trying to build something from scratch, but everyone was happy to help when I needed it and that was really cool to have during this process.
For now, check out the video, watch more videos on our YouTube channel so it looks like I am doing my job, and forever hope this clock won’t blow up and burn down SparkFun.
Via Westline T2B http://www.rssmix.com/


Comments
Post a Comment